What are the Different Types of Yoga Poses?

Different Types of Yoga Poses

Yoga is a set of physical and mental exercises. There are Different Types of Yoga Poses that are beneficial for a person who practices yoga on a regular basis. Different types of yoga poses are beneficial for different types of body parts. It is also beneficial for mental health which nowadays becomes a very sensitive issue.

So Yoga is a complete solution for both physical and mental health.

Today, we are going to see Different Types of Yoga Poses that divide all yoga poses. All these poses are created in such a way that strengthens different body parts in different ways.

There are 11 Different Types of Yoga Poses

  1. Standing Poses: These poses focus on improving balance, strength, and flexibility. They also increase the confidence of the person who practices yoga.
    Tadasana (Mountain Pose) and Virabhadrasana (Warrior Poses) are examples of Standing Yoga Poses.
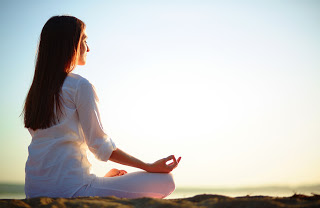
  2. Seated Poses: These poses are practiced while sitting. They enhance flexibility in the hips, hamstrings, and lower back.
    Siddhasana or Accomplished Pose and Padmasana (Lotus Pose) are examples of Seated Yoga Poses.
  3. Twisting Poses: Twisting poses are beneficial for spinal mobility and detoxification.
    Ardha Matsyendrasana (Half Lord of the Fishes Pose) is an example of Twisting Yoga Poses.
  4. Forward Bends: These poses involve bending forward, promoting flexibility in the spine and hamstrings.
    Uttanasana (Forward Fold) and Paschimottanasana (Seated Forward Bend) are examples of Forward Yoga Poses.
  5. Backbends: Backbends help improve posture, strengthen the back muscles, and open the chest and shoulders.
    Bhujangasana (Cobra Pose) and Ustrasana (Camel Pose) are examples of Backbends.
  6. Balancing Poses: These poses enhance concentration, focus, and balance. It includes Vrikshasana(Tree Pose) and Bakasana (Crow Pose).
  7. Inversions: Inversions involve going upside down, which can improve circulation, build core strength, and boost energy levels. It includes Sirsasana (Headstand) and Sarvangasana (Shoulderstand).
  8. Restorative Poses: Restorative poses are deeply relaxing and help in reducing stress and fatigue. Examples: Savasana (Corpse Pose) and Balasana (Child's Pose).
  9. Core Strengthening Poses: These poses target the abdominal muscles, improving core strength and stability. Examples include Naukasana(Boat Pose) and Plank Pose.
  10. Prone Poses: Prone poses are practiced lying on the abdomen and are excellent for strengthening the back muscles. These types of poses need high muscle strength, so must be done only by people who have done yoga poses on a regular basis for at least 6 months.
    Examples: Salabhasana (Locust Pose) and Dhanurasana (Bow Pose).
  11. Supine Poses: Supine poses are practiced lying on the back and focus on relaxation and gentle stretching. Examples: Supta Baddha Konasana (Reclining Bound Angle Pose) and Supta Matsyendrasana (Supine Spinal Twist).

So, above are broadly Different Types of Yoga Poses. While doing any of the above poses one should always follow all the instructions given and before starting Yoga, one should definitely take advice from the expert in order to avoid any future complications.
Comments

Popular posts from this blog

सिद्धासन माहिती आणि फायदे मराठी मध्ये 

मनाची एकाग्रता ही बुद्धीचं काम करणाऱ्या लोकांसाठी अतिशय महत्वाची असते. विद्यार्थ्यांसाठी, खेळाडूंसाठी किंवा असं कुठलाही काम ज्यात अतिशय एकाग्र होण्याची गरज लागते अशा सर्व लोकांसाठी सिद्धासन हे अतिशय उपयुक्त आणि सोपं आसन आहे. योगाभ्यास करण्यासाठी सुद्धा मनाची एकाग्रता लागते म्हणूनच इतर सर्व आसनांच्या आधी हे आसन केलं जातं ज्यामुळे पुढील आसनांचा अभ्यास एकाग्रतेने होऊ शकेल. सिद्धासन म्हणजे काय? सिद्धासन म्हणजे सिद्ध लोकांचे आसन किंवा आसनांचा अभ्यास करायला सिद्ध करणारे आसन. या आसनाचा नियमित अभ्यास करणाऱ्यां लोकांमध्ये आपल्या मनावर खूप चांगल्या प्रकारे ताबा ठेवण्याची क्षमता असते. ज्यांना एखादी सिद्धी मिळवायची आहे म्हणजे एखादं ध्येय गाठायचं आहे अशा लोकांसाठी सिद्धासन हे अतिशय उपयोगी आहे. सिद्धासन हे मुख्यत्वे मानसिक एकाग्रतेसाठी उपयोगी पडते. तसेच कुठल्याही प्रकारचे श्वसनाचे व्यायाम अथवा ध्यान करताना सर्वात सहज अणि सोपे आसन म्हणून याचा निश्चित उपयोग होतो. माणसाच्या मनाचे शत्रु समजले जातात ते षडरिपु म्हणजे ...

Pranasana - Steps and Benefits

You might like our post How to do Shalabhasan or Grasshopper pose Pranasana Steps - Sit upright on the ground and relax yourself. Now, keep your legs straight in front of you. Bend the left knee and keep the left foot on the right thigh. Bend the right knee bringing the sole of the right foot to the ground in line with the left knee. Now, try to keep right arm on some distance (as much as possible) from the body but that arm should be below the right knee. Keep left arm near the body for support. This is Pranasana. This should be done from other side also to keep the balance of the exercise. Precautions to take before doing Pranasana - Do this asana with an empty stomach. Don’t eat anything 3-4 hours before doing this asana. Don’t do it forcefully. Do it, till you fill comfortable otherwise it will harm you. Take doctors advice before starting to do this asana. Weak people should do it very carefully. Do this pose in the morning. Beginner – Do it for 5-6 seconds ...

Gomukhasana or Cow Face Pose - Steps and Benefits

Indian Yoga has many asanas/poses which gives really unpredictable but positive results. This is another next level of asana or a position. When we complete the position of Gomukhasana, it looks like a Cow Face, so that it is called Gomukhasana or Cow Face Pose. You might like our post How to do Ardha Matsyendrasan or Half Spinal Twist Pose Steps of Gomukhasana or Cow Face Pose - Sit on the ground with stretched legs in front of you. Keep your back strait and erect. Now slowly bend your left leg, and place it under your right buttock. Then bend your right leg and place it over your left thigh. Keep your both knees close together as they are stacked one on top of the other. Now, slowly fold your left arm and place it behind your back. Take your right arm over your right shoulder, and stretch it as much as you can until it holds your left hand. Initially, it will be little difficult to do this. But after some days of practise, you will be able to do it. Keep the trunk...